Ideal Logic Combi 30 Wireless Thermostat Instructions: Article Plan
This detailed plan outlines a comprehensive guide for installing, operating, and troubleshooting the Ideal Logic Combi 30 wireless thermostat, ensuring optimal heating control.
The Ideal Logic Combi 30 offers efficient home heating, enhanced by a wireless thermostat for convenient control and precise temperature management throughout your living spaces.
Overview of the Combi 30 Boiler
The Ideal Logic Combi 30 is a highly efficient condensing combination boiler, designed to deliver both central heating and domestic hot water on demand. It’s known for its compact size, making it suitable for various home types and installation locations. This boiler boasts a user-friendly interface and reliable performance, offering consistent warmth and hot water supply. Its key features include a high efficiency rating, reducing energy bills, and a quiet operation for minimal disruption. The Combi 30 is a dependable choice for modern heating systems, and pairing it with a wireless thermostat further enhances its convenience and control capabilities.
Benefits of a Wireless Thermostat
A wireless thermostat, like the one designed for the Ideal Logic Combi 30, offers significant advantages over traditional wired models. Eliminating the need for complex wiring simplifies installation and allows for flexible placement throughout your home, optimizing temperature control. Remote control capabilities, often via a smartphone app, provide convenience and energy savings. Precise temperature regulation ensures comfort while minimizing wasted energy. The sleek, modern design complements any interior, and the ease of programming allows for customized heating schedules, ultimately reducing heating costs and enhancing overall home comfort.
Scope of this Guide
This guide provides a complete walkthrough for the Ideal Logic Combi 30 wireless thermostat, covering everything from initial setup to advanced features. We’ll detail pairing the thermostat and receiver, mounting procedures, and battery installation. Step-by-step instructions will explain setting the time, date, and programming a 7-day heating schedule. Troubleshooting common issues like display problems and communication errors is included. Furthermore, we’ll cover battery replacement, maintenance, and essential safety information, ensuring you can confidently operate and maintain your heating system.

Understanding the Wireless Thermostat Components
This section details the thermostat and receiver units, explaining their functions and how they wirelessly communicate to control your Ideal Combi 30 boiler.
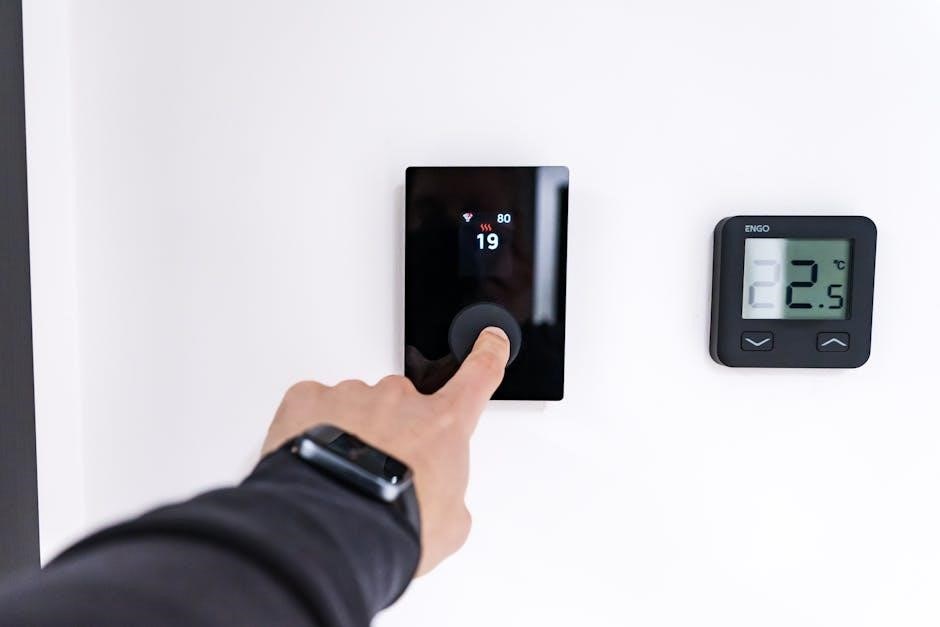
Thermostat Unit – Front View & Buttons
The Ideal Logic Combi 30 thermostat features a user-friendly interface. The front panel typically displays the current time, set temperature, and operating mode. Key buttons include ‘Menu’ for accessing settings, ‘Up’ and ‘Down’ arrows for temperature adjustment and navigation, a ‘Select’ or ‘Confirm’ button to validate choices, and potentially a ‘Mode’ button to cycle through heating options.
Understanding each button’s function is crucial for effective operation. The display may also show icons indicating wireless signal strength, battery level, and active program schedules. Familiarize yourself with these visual cues for seamless control of your home’s heating system.
Receiver Unit – Connection to Boiler
The receiver unit acts as the bridge between the wireless thermostat and your Ideal Logic Combi 30 boiler. It typically connects to the boiler’s existing thermostat wiring, often utilizing terminals for live, neutral, and switched live connections. Correct wiring is paramount for safe and reliable operation; always consult a qualified heating engineer if unsure.
The receiver unit requires a secure mounting location near the boiler. Ensure it’s protected from excessive moisture or heat. Once connected, the receiver communicates wirelessly with the thermostat, relaying temperature requests to adjust the boiler’s output accordingly.
Wireless Communication Protocol
The Ideal Logic Combi 30 wireless thermostat utilizes a proprietary radio frequency (RF) protocol for communication with the receiver unit. This protocol ensures a secure and reliable connection, minimizing interference from other wireless devices in the home. The range is typically sufficient to cover most domestic properties, but obstructions like thick walls can reduce signal strength.
The system employs a one-way communication scheme, where the thermostat sends temperature requests to the receiver. The receiver then signals the boiler. Regular signal checks are recommended to confirm consistent connectivity and optimal system performance.

Initial Setup and Installation
Proper installation is crucial for optimal performance. This section details pairing the thermostat, mounting it securely, and correctly installing batteries for reliable operation.
Pairing the Thermostat and Receiver Unit
Establishing a secure wireless link between the thermostat and receiver unit is the first critical step. Typically, this involves a specific button-pressing sequence on both devices simultaneously. The receiver unit, connected to your Combi 30 boiler, needs to be within range of the thermostat for successful pairing. Consult the user manual for the precise procedure, as it may vary slightly. A successful pairing is usually indicated by a confirmation signal – a steady light or a specific display message on the thermostat screen. If pairing fails, ensure batteries are fresh and repeat the process, minimizing interference from other wireless devices.
Mounting the Thermostat on the Wall
Careful placement is key for accurate temperature readings. Choose a location away from direct sunlight, drafts, and heat sources like lamps or kitchen appliances. The thermostat should be mounted at a height of approximately 1.5 meters (5 feet) from the floor, on an internal wall. Use the provided mounting plate and screws, ensuring it’s securely fastened. Avoid thick external walls, as they can insulate the thermostat and affect its performance. Once mounted, double-check the thermostat is level for optimal aesthetic appeal and functionality.
Powering the Thermostat – Battery Installation
The Ideal Logic Combi 30 thermostat requires batteries for wireless operation. Typically, it uses AA alkaline batteries – check your specific model’s documentation for confirmation. Open the battery compartment, usually located on the rear or side of the unit. Insert the batteries, observing the correct polarity (+ and -) as indicated inside the compartment. A blinking battery symbol on the display indicates low power. Replace batteries promptly to avoid interruption of heating control. Ensure a secure fit, and close the compartment firmly.
Basic Operation: Setting the Time and Date
Accurate time and date settings are crucial for proper scheduling. Access these settings via the thermostat’s menu, adjusting them using the control buttons for optimal performance.
Accessing the Time/Date Settings
To access the time and date settings on your Ideal Logic Combi 30 wireless thermostat, begin by ensuring the unit is powered on and displaying the current time. Press the ‘Menu’ or ‘Mode’ button – the specific label may vary slightly depending on your model – to enter the main menu. Navigate through the menu options using the up and down arrow buttons until you locate the ‘Time/Date’ setting;
Once highlighted, press the ‘Select’ or ‘OK’ button to enter the time and date adjustment mode. The current time will likely be displayed first, flashing to indicate it’s ready for modification. Refer to your thermostat’s display for specific button prompts and instructions.
Adjusting the Time
With the time setting flashing, use the up and down arrow buttons to increment or decrement the hour. Press the ‘Select’ or ‘OK’ button to confirm the hour and move to the minutes setting. Repeat the process – using the arrow buttons to adjust the minutes and confirming with ‘Select’ or ‘OK’. Pay close attention to the AM/PM indicator, if present, and adjust accordingly.
Ensure you set the correct time, as this is crucial for accurate scheduling. Once both the hour and minutes are set, press ‘Menu’ or ‘Mode’ to save the changes and return to the main time/date setting or exit entirely.
Setting the Correct Date
After setting the time, navigate to the date setting using the ‘Select’ or ‘Menu’ button. The day will likely be flashing, prompting adjustment. Utilize the up and down arrow buttons to select the correct day of the month. Confirm your selection with ‘Select’ or ‘OK’, then proceed to adjust the month using the same method.
Finally, set the year. Accurate date setting is vital for correct program operation, especially for holiday mode or seasonal adjustments. Save all changes by pressing ‘Menu’ or ‘Mode’ to return to the main display.

Programming the Heating Schedule
The 7-day programmable function allows customized heating schedules, optimizing comfort and energy efficiency by setting different temperatures for various times throughout the week.
Understanding the 7-Day Programmable Function
The Ideal Logic Combi 30’s 7-day programmable function is a core feature enabling tailored heating control throughout the week. Each day can be individually programmed with multiple time slots, allowing you to precisely set desired temperatures for different periods – mornings, evenings, and overnight, for example. This flexibility optimizes comfort while minimizing energy waste. You can create distinct schedules for weekdays and weekends, accommodating varying routines. The thermostat remembers these settings, automatically adjusting the heating to match your programmed preferences. This ensures a consistently comfortable home environment and potentially lower energy bills, offering a convenient and efficient heating solution.
Setting Temperature for Different Time Slots
To set temperatures for specific time slots, navigate to the programming mode on your Ideal Logic Combi 30 thermostat. Each day is divided into segments, typically morning, day, evening, and night. For each slot, you can independently define a target temperature. Use the thermostat’s controls to increase or decrease the temperature to your preferred level. Consider lower temperatures during periods of inactivity, like when you’re at work or asleep, to conserve energy. The thermostat will automatically transition between these setpoints, maintaining comfort when needed and reducing heating costs when possible.
Copying Programs to Multiple Days
The Ideal Logic Combi 30 simplifies scheduling by allowing you to copy a programmed schedule from one day to others. After setting your desired temperatures and time slots for a single day – for example, Monday – access the ‘copy’ function within the programming menu. Select the days you wish to apply the same schedule to, such as Tuesday through Friday. Confirm the selection, and the thermostat will replicate the program. This feature saves significant time and ensures consistent heating throughout the week, eliminating the need for repetitive programming.
Advanced Features and Settings
Explore enhanced control options like the ‘Hours’ function, Holiday Mode for temporary schedules, and customizable frost protection settings for optimal efficiency and comfort.
Using the ‘Hours’ Function
The ‘Hours’ function on the Ideal Logic Combi 30 thermostat allows for temporary adjustments to your heating schedule without altering the pre-programmed settings. This is particularly useful for unexpected changes in routine or short-term heating needs. To utilize this feature, access the settings menu and select ‘Hours’. You can then specify a duration, in hours, for which the heating will operate at a chosen temperature.
Once the set duration elapses, the thermostat automatically reverts to the original, programmed schedule. This prevents the need for manual reprogramming and ensures consistent heating control. Note that using this function overrides the existing schedule for the specified timeframe, offering flexible and convenient temperature management.
Holiday Mode – Setting Temporary Schedules
The Holiday Mode feature of the Ideal Logic Combi 30 is designed for extended absences, allowing you to maintain a minimal level of heating to prevent frozen pipes while conserving energy. Access Holiday Mode through the thermostat’s settings menu. You’ll be prompted to enter the start date and duration of your absence.
During this period, the thermostat will maintain a pre-set frost protection temperature. Upon your return, the system automatically reverts to your regular heating schedule; This ensures a warm welcome home without wasted energy during your time away, providing both comfort and efficiency.
Frost Protection Settings
The Ideal Logic Combi 30 thermostat incorporates essential frost protection settings to safeguard your heating system during cold weather, even when the heating isn’t actively scheduled. This feature automatically activates if the ambient temperature drops to around 5°C, preventing pipe freezing and potential damage.
While typically enabled by default, it’s crucial to verify its activation within the thermostat’s advanced settings. This ensures your property remains protected during prolonged periods of low temperature, offering peace of mind and preventing costly repairs. Regular checks are recommended.

Troubleshooting Common Issues
This section addresses frequent problems like display malfunctions, communication errors, and inaccurate temperature readings, providing solutions for a smoothly functioning thermostat system.
Display Problems (Blinking, Blank)
A blinking display often indicates low batteries, requiring immediate replacement with the recommended type. A completely blank display similarly suggests insufficient power; try fresh batteries first. If the issue persists after battery changes, verify the thermostat and receiver unit are within their wireless communication range. Ensure no strong interference sources are nearby.
Occasionally, a reset of the thermostat might resolve display glitches. Consult the full manual for specific reset procedures. If problems continue, document the blinking pattern (if any) and contact Ideal Heating’s customer support, providing details for efficient assistance. Avoid attempting internal repairs.
Communication Errors Between Thermostat & Boiler
Wireless signal interference is a common cause of communication failures. Ensure a clear line of sight between the thermostat and receiver unit, minimizing obstructions like thick walls or metal objects. Check the receiver unit’s connection to the boiler, verifying all wiring is secure. Low batteries in either the thermostat or receiver can also disrupt communication.
Attempt re-pairing the thermostat and receiver following the initial setup instructions. If the problem persists, temporarily relocate the thermostat closer to the boiler to test signal strength. Contact Ideal Heating support if issues remain, detailing the error symptoms.
Incorrect Temperature Readings
Several factors can contribute to inaccurate temperature displays. Ensure the thermostat isn’t positioned near heat sources like lamps or direct sunlight, which can artificially inflate readings. Drafts from windows or doors can also cause discrepancies. Verify the thermostat is calibrated correctly; some models allow for temperature offset adjustments within the settings menu.
If the issue continues, check for obstructions blocking airflow around the thermostat. A faulty temperature sensor within the unit may require professional repair or replacement. Compare the thermostat’s reading with a separate, reliable thermometer.

Battery Replacement and Maintenance
Regular battery checks and replacements are crucial for consistent operation; a blinking battery symbol indicates low power, requiring immediate attention and new batteries.
Identifying Low Battery Warnings

The Ideal Logic Combi 30 wireless thermostat provides clear visual cues when the batteries are running low, preventing unexpected heating disruptions. The most common indicator is a blinking battery symbol displayed prominently on the thermostat’s screen. Additionally, a blinking display itself can signal insufficient power. In some instances, the entire display may go blank, indicating a critical battery level.
Promptly addressing these warnings is essential to maintain consistent temperature control and avoid the inconvenience of a non-functional thermostat. Ignoring these signals could lead to the heating system not responding to commands, especially during colder periods. Regular checks, even before warnings appear, are recommended for optimal performance.
Recommended Battery Types
For optimal performance and longevity of your Ideal Logic Combi 30 wireless thermostat, it’s crucial to use the correct battery type. The thermostat typically requires AA alkaline batteries. While other battery types may function, alkaline batteries are specifically recommended by the manufacturer for their consistent power output and reliability.
Avoid using rechargeable batteries, as their voltage can differ from alkaline batteries and potentially cause inaccurate readings or malfunctions. Furthermore, do not use mixed battery types (old and new, or different brands) as this can reduce overall performance and lifespan. Always replace all batteries simultaneously for best results.
General Thermostat Cleaning
Maintaining a clean thermostat ensures accurate temperature readings and prolongs its lifespan. To clean your Ideal Logic Combi 30 thermostat, first, ensure the unit is powered off or remove the batteries as a safety precaution. Use a soft, dry cloth to gently wipe the exterior surfaces. Avoid using abrasive cleaners, solvents, or excessive moisture, as these can damage the display or internal components.
For stubborn dirt, lightly dampen the cloth with water, ensuring it’s wrung out thoroughly before wiping. Never spray liquids directly onto the thermostat. Regularly dusting the unit will prevent buildup and maintain optimal functionality.

Safety Information and Warnings
Always utilize approved parts for repairs, and exercise caution with electrical connections. Adhere to the WEEE Directive (2012/19/EC) for responsible disposal.
Using Approved Parts Only
Maintaining the integrity of your Ideal Logic Combi 30 system is paramount for safe and efficient operation. Therefore, it is absolutely crucial to exclusively use parts that have been explicitly approved by Ideal Boilers. Employing reconditioned, copied, or unauthorized components can compromise the thermostat’s functionality, potentially leading to inaccurate temperature readings, system malfunctions, or even safety hazards.
Using non-approved parts will invalidate your warranty and could create risks. Always consult the official Ideal Boilers documentation or contact their customer support to verify part compatibility before undertaking any repairs or replacements. Prioritize safety and system reliability by adhering to this vital guideline.
Electrical Safety Precautions
Working with electrical systems requires utmost caution. Before undertaking any installation or maintenance involving the Ideal Logic Combi 30 wireless thermostat, always disconnect the power supply to both the thermostat receiver unit and the boiler at the main electrical switchboard. Never attempt repairs while power is connected.
Ensure hands and work surfaces are dry to prevent electric shock. If you are uncomfortable working with electrical wiring, consult a qualified and certified electrician. Improper wiring can lead to fire hazards or damage to the system. Always adhere to local electrical codes and regulations for safe installation.
WEEE Directive Compliance (2012/19/EC)
This product complies with the Waste Electrical and Electronic Equipment (WEEE) Directive 2012/19/EC. This directive aims to minimize the environmental impact of electronic waste. At the end of its useful life, do not dispose of the Ideal Logic Combi 30 wireless thermostat with general household waste.
Instead, please utilize designated collection facilities for recycling electronic equipment. Proper disposal ensures valuable materials are recovered and hazardous substances are handled safely, protecting the environment. Contact your local authority for information on WEEE recycling centers in your area.